承接之前 Transmission 與 Deluge 的教學
今天放上四個常用 PT 客戶端裡面安裝最複雜的 Rtorrent + Rutorrent 安裝教學
跟 Qbittorrent、Transmission、Deluge 比起來,Rtorrent 算是一個 PT 使用比例佔有率比較少的客戶端
並不是它不好用,而是它不像其它三個客戶端有 Windows 版本可以使用
Windows下使用 Rtorrent 只能透過 Cygwin 執行,與其這樣還不如直接在 Linux 的環境運行
然而在Linux安裝對於新手而言,也不是那麼容易的
網路上也有許多對應各個 Linux 系統而成的 rutorrent 安裝一鍵腳本
或是透過 Ipkg、Dkpg 源來安裝,的確蠻方便也省時省力
但因大部份不支援 IPV6,這邊就不多加討論
Rtorrent 是一個純終端機下操作的客戶端,除了極少數的使用者
大部分使用者會加裝 Rutorrent (WebUI)
Rutorren t需要具備 Apache、Nginx、Lighttpd 等 Server 環境及 PHP、XMLRPC 的環境
官方 Wiki 介紹裡面有介紹以下幾種操作模式
Apace (2.2)
1 2 | SCGIMount RPC2 127.0.0.1:5000 ## Mod_SCGI ## |
Apache (2.4)
1 2 | ProxyPass /RPC2 scgi://127.0.0.1:5000 ## Mod Proxy SCGI ## |
Lighttpd
1 2 3 4 5 6 7 8 9 10 11 | scgi.server = ( "/RPC2" => ( "127.0.0.1" => ( "host" => "127.0.0.1", "port" => 5000, "check-local" => "disable" ) ) ) ## Lighttpd Specific SCGI ## |
Nginx
1 2 3 4 5 6 | location /RPC2 { scgi_pass 127.0.0.1:5000; include scgi_vars; scgi_var SCRIPT_NAME /RPC2; } ## Nginx SCGI ## |
Nginx 本身只是單純的 HTTP Server,如果需要執行程式,還得藉助 CGI 的幫忙
你可以定義 location proxy_pass 的方式使用 Apache + Nginx 環境
也可以直接把 Apache + PHP 改為 Nginx + PHP-FPM來執行
(listen TCP Socket or UNIX Kernel Socket 讓 Nginx fastcgi_pass 來呼叫服務)
之前在 Ubuntu 16.04 TLS 與 Debian 8實作的時候,因為習慣了 Debian 系列的環境
在編譯上並沒有遇到什麼問題及困難
在 Centos 7 Rtorrent 實作的時候,發現 Selinux 權限的問題
如果真的無法設定 Selinux 相關權限話,建議把 Selinux 關了省事
====================================================================================
①環境準備,請先切換具有 root 權限的 sudo 使用者
1 2 3 | yum update yum -y groupinstall 'Development tools' yum -y install cppunit-devel libsigc++20-devel.x86_64 libcurl-devel xmlrpc-c-devel.x86_64 openssl-devel ncurses-devel libtool |
②設定環境變量 (若不先設定,編譯 libtorrent 會報錯 libtorrent.so.5)
1 2 3 | echo "/usr/local/lib/" >> /etc/ld.so.conf ldconfig export PKG_CONFIG_PATH=/usr/local/lib/pkgconfig |
③安裝一些後續在執行程式 or Rutorrent 插件會使用到的軟體
1 2 3 4 5 | yum install -y epel-release rpm --import /etc/pki/rpm-gpg/RPM-GPG-KEY-EPEL-7 rpm --import http://li.nux.ro/download/nux/RPM-GPG-KEY-nux.ro rpm -Uvh http://li.nux.ro/download/nux/dextop/el7/x86_64/nux-dextop-release-0-1.el7.nux.noarch.rpm yum install -y gcc-c++ zip unzip screen sox unrar ffmpeg mediainfo |
④下載源碼編譯 libtorrent-0.13.6
1 2 3 4 5 6 7 8 | git clone https://github.com/rakshasa/libtorrent.git cd libtorrent/ git checkout origin/feature-bind git checkout 9eb9ba2 ./autogen.sh ./configure make make install |
⑤下載源碼編譯 rtorrent-0.9.6
1 2 3 4 5 6 7 8 9 | ldconfig git clone https://github.com/rakshasa/rtorrent.git cd rtorrent/ git checkout origin/feature-bind git checkout b088c1c ./autogen.sh ./configure --with-xmlrpc-c --with-ncurses --enable-ipv6 --disable-debug make make install |
⑥設定 .rtorrent.rc 文件
1 | vi ~/.rtorrent.rc |
** 可參考我的設定,預設相關目錄指定路徑為 home user 裡的 Downloads 資料夾
(##….##的內容為設定說明,請勿也寫入設定檔內)
1 2 3 4 5 6 7 8 9 10 11 12 13 14 15 16 17 18 19 20 21 22 23 24 25 26 | directory = /home/user/Downloads ## 預設下載目錄,可自行設定想存放位置 ## session = /home/user/Downloads/.sessions ## 可自行設定想存放位置 ## schedule = watch_dir,5,5,"load.start=/home/user/Downloads/torrents/*.torrent, d.directory.set=/home/user/Downloads/incoming" ## 可自行指定想存放位置 ## schedule = untied_directory,5,5,stop_untied= schedule = untied_directory,5,5,close_untied= schedule = untied_directory,5,5,remove_untied= schedule = tied_directory,5,5,start_tied= schedule = low_diskspace,10,30,close_low_diskspace=100M throttle.min_peers.normal.set = 50 ## 總體最小peer連接數 ## throttle.max_peers.normal.set = 500 ## 總體最大peer連接數 ## throttle.global_down.max_rate.set_kb = 0 ## 總體下載限速,0為不限速 ## throttle.global_up.max_rate.set_kb = 0 ## 總體上傳限速,0為不限速 ## dht.mode.set = disable protocol.pex.set = no ## 關閉使用者交換 ## port_range = 58888-58888 ## 可設定想用的port ## port_random = no encryption = allow_incoming,try_outgoing,enable_retry dht = off check_hash = no encoding_list = UTF-8 scgi_port = 127.0.0.1:5000 ip = 0.0.0.0 network.http.ssl_verify_peer.set = 0 ## 可解決tracker使用https報錯的問題 ## |
⑦建立設定檔裡面相關資料夾並給予權限
1 2 3 4 5 | mkdir /home/user/Downloads mkdir /home/user/Downloads/.sessions mkdir /home/user/Downloads/incoming mkdir /home/user/Downloads/torrents chown -R *sudo user* /home/user/Downloads |
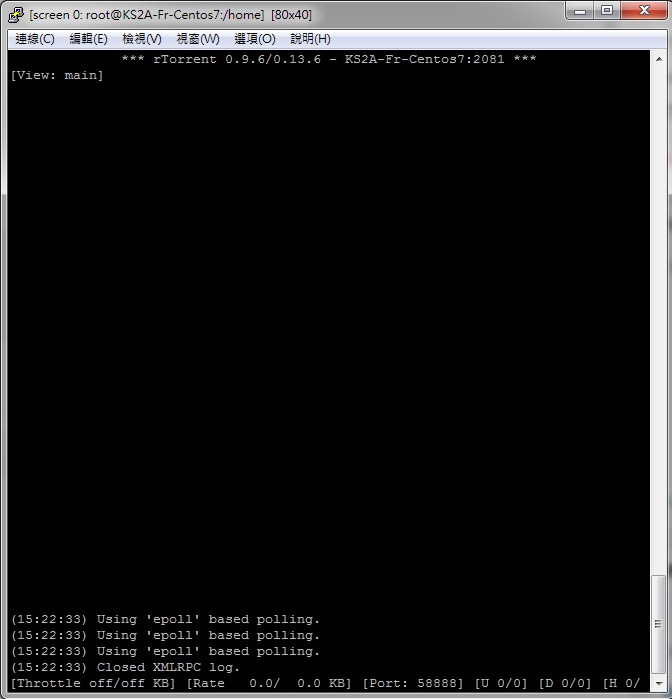
⑧透過 screen 執行 rtorrent 是否成功
1 2 | screen -S rt /usr/local/bin/rtorrent |
若看到以下畫面,代表 rtorrent 成功執行
結束可按 Ctrl+A 再按 Q 跳回 Screen 主畫面,再輸入 exit 關閉 Screen
回到原始主畫面繼續進行後面的步驟
⑨安裝 Nginx + PHP-FPM
1 2 | yum -y install nginx yum -y install php php-mysql php-fpm php-gd php-ldap php-odbc php-pear php-xml php-xmlrpc php-mbstring php-snmp php-soap curl curl-devel |
⑩修正 pathinfo 安全性問題
1 2 | vi /etc/php.ini ## 找到cgi.fix_pathinfo=1,取消註解把1改成0 ## |
⑪若不會設定 Selinux,可關閉 Selinux
1 2 3 4 | getenforce ## 檢查Selinux Status ## setenforce 0 ## 暫時關閉Selinux ## vi /etc/selinux/config ## 將SELINUX=enforcing改為SELINUX=disabled即可永久關閉 ## |
⑫設定 PHP-FPM
1 2 3 4 5 6 7 8 9 10 11 12 13 14 15 | vi /etc/php-fpm.d/www.conf 將 listen = 127.0.0.1:9000 取消註解,改為listen = /var/run/php-fcgi.sock listen.owner = nobody 取消註解 listen.group = nobody 取消註解 user = apache 改為 user = 你的user group = apache 改為 user = 你的user 尋找以下內容,全部取消註解 env[HOSTNAME] = $HOSTNAME env[PATH] = /usr/local/bin:/usr/bin:/bin env[TMP] = /tmp env[TMPDIR] = /tmp env[TEMP] = /tmp |
⑬安裝設定 HTTP Basic Authentication (安裝 rutorrent 網頁加載密碼的工具)
1 2 | yum install -y httpd-tools htpasswd -c /etc/nginx/.htpasswd user ## user請填入你想用來網頁認證的使用者,並給予密碼 ## |
⑭將預設網頁 cancel 掉,設定 nginx.conf & rt.conf 相關權限
1 2 3 4 5 6 7 8 9 10 11 12 13 14 15 16 17 18 19 20 21 22 23 24 25 26 27 28 29 30 31 32 33 34 35 36 37 | mv /usr/share/nginx/html/index.html /usr/share/nginx/html/index.old.html chown -R 你的user /usr/share/nginx/html vi /etc/nginx/nginx.conf ## 將原本內容全部移除,取代成以下內容 ## user root; worker_processes auto; error_log /var/log/nginx/error.log warn; pid /run/nginx.pid; events { worker_connections 1024; } http { include /etc/nginx/mime.types; default_type application/octet-stream; log_format main '$remote_addr - $remote_user [$time_local] "$request" ' '$status $body_bytes_sent "$http_referer" ' '"$http_user_agent" "$http_x_forwarded_for"'; access_log /var/log/nginx/access.log main; sendfile on; #tcp_nopush on; keepalive_timeout 65; #gzip on; include /etc/nginx/conf.d/*.conf; } |
1 2 3 4 5 6 7 8 9 10 11 12 13 14 15 16 17 18 19 20 21 22 23 24 25 26 27 28 29 30 31 32 33 34 35 36 | vi /etc/nginx/conf.d/rt.conf ### 貼入以下內容 ### server { listen 80; server_name _; root /usr/share/nginx/html/rt; index index.php index.html index.htm; auth_basic "PW For Rutorrent"; auth_basic_user_file /etc/nginx/.htpasswd; location / { try_files $uri $uri/ =404; } error_page 404 /404.html; error_page 500 502 503 504 /50x.html; location = /50x.html { root /usr/share/nginx/html; } location /RPC2 { scgi_pass 127.0.0.1:5000; include scgi_params; scgi_param SCRIPT_NAME /RPC2; } location ~ \.php$ { try_files $uri =404; fastcgi_pass unix:/var/run/php-fcgi.sock; fastcgi_index index.php; fastcgi_param SCRIPT_FILENAME $document_root$fastcgi_script_name; include fastcgi_params; } } |
⑮安裝 PHP-Geoip 並更新 GeoIP.dat
1 2 3 4 5 | yum -y install php-pecl-geoip rm /usr/share/GeoIP/GeoIP.dat cd /usr/share/GeoIP wget http://geolite.maxmind.com/download/geoip/database/GeoLiteCountry/GeoIP.dat.gz gunzip GeoIP.dat.gz |
⑯啟動 Nginx & PHP-FPM 並設定開機自啟動
1 2 3 4 | systemctl start nginx.service systemctl enable nginx.service systemctl start php-fpm.service systemctl enable php-fpm.service |
⑰下載 Rutorrent 3.8 並移動到 Nginx 目錄
1 2 3 | wget https://github.com/Novik/ruTorrent/archive/master.zip unzip master.zip mv ruTorrent-master /usr/share/nginx/html/rt |
⑱設定 systemd Rtorrent-Server
1 2 3 4 5 6 7 8 9 10 11 12 13 14 15 | vi /etc/systemd/system/rtorrent.service ## 貼入以下內容 ## [Unit] Description=rtorrent After=network.target [Service] User=root Type=forking ExecStart=/usr/bin/screen -d -m -S rutorrent /usr/local/bin/rtorrent -n -o import=/root/.rtorrent.rc ExecStop=/usr/bin/screen -S rutorrent -X quit [Install] WantedBy=multi-user.target |
⑱再次啟動 Rtorrent 並設定開機啟動
1 2 3 | systemctl daemon-reload systemctl start rtorrent.service systemctl enable rtorrent.service |
⑲設定 Rutorrent 相關 plugin 權限
1 | chown -R *你的sudo user* /usr/share/nginx/html/rt/share |
⑳防火牆檢查
1 | systemctl status firewalld |
若為開啟狀態,並需把使用Web Port 80
與前面設定檔使用的Port 58888
加入到防火牆內 (若前面Port 58888有修改成其它Port請自行更改)
1 2 3 | firewall-cmd --permanent --add-port=80/tcp firewall-cmd --permanent --add-port=58888/tcp firewall-cmd --permanent --add-port=58888/udp |
重啟防火牆設定
1 | firewall-cmd --reload |
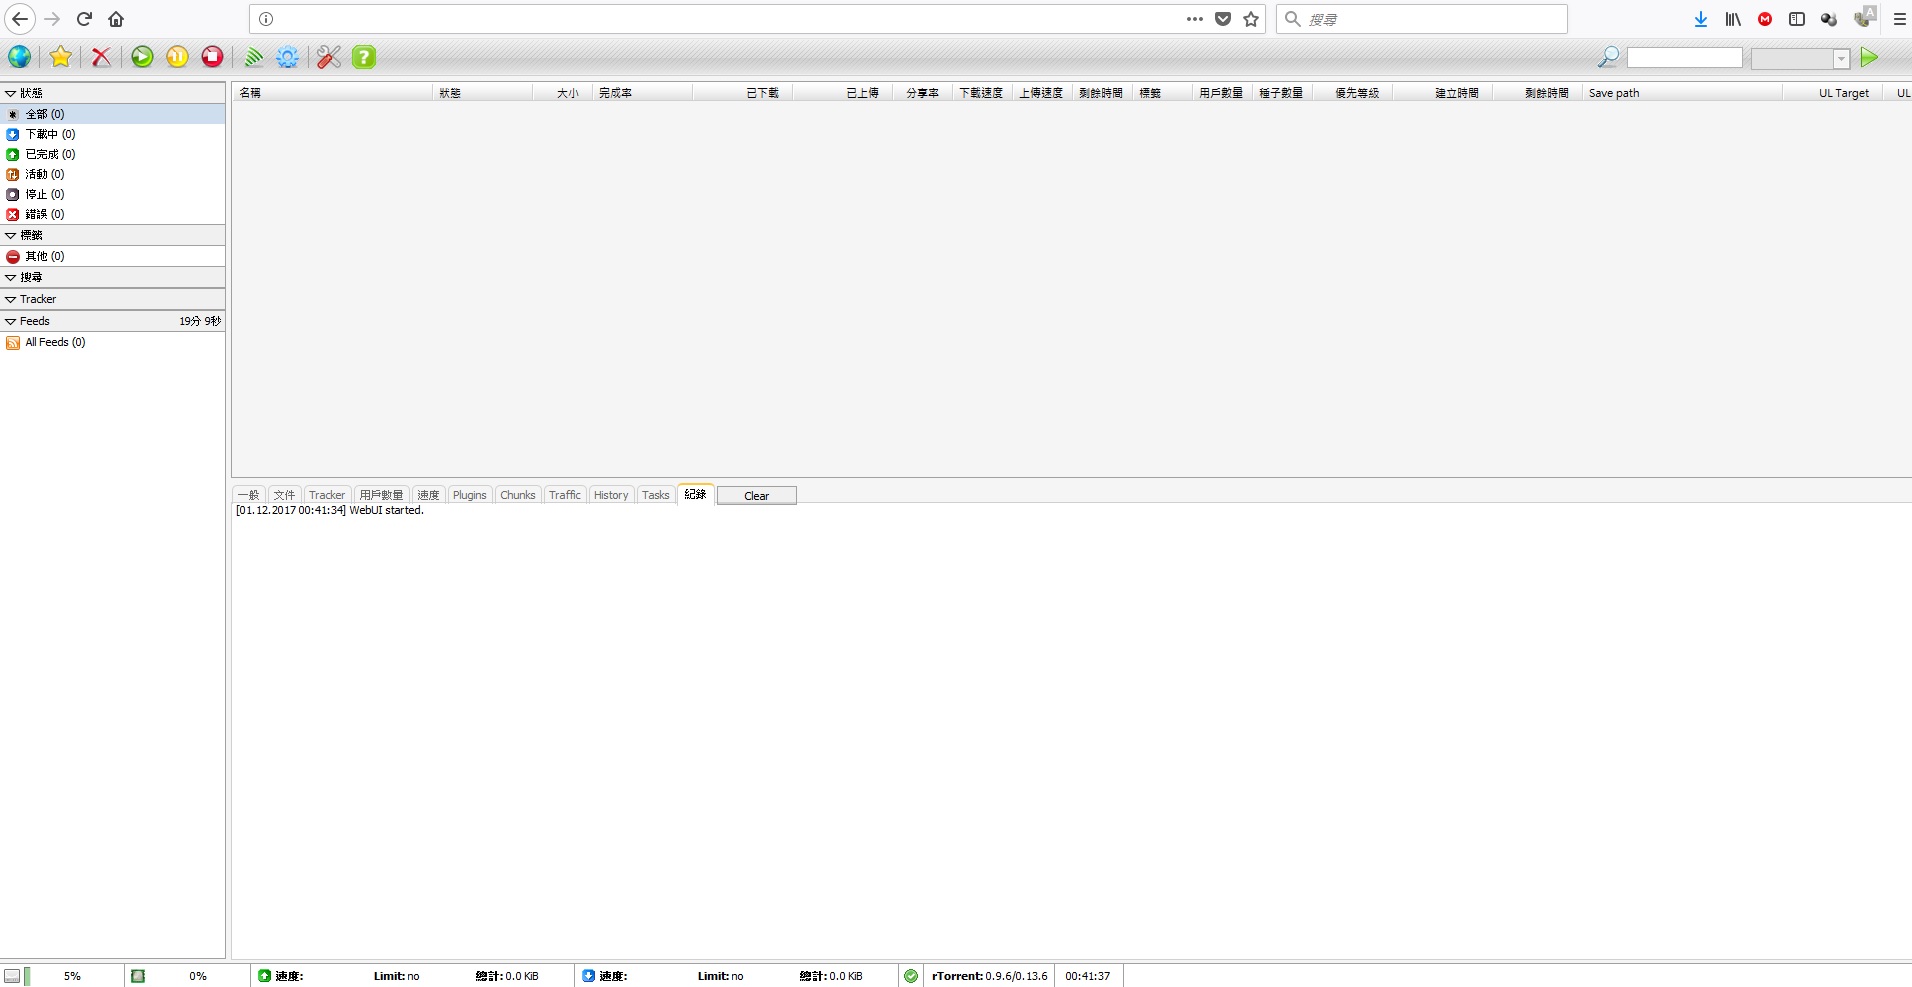
透過 Web 登入 Rutorrent (WebUI)
1 | http://你的ip/ |
**如無法正確開啟,請檢查防火牆是否開啟 Port 80 (TCP) & Rt 裡面設定使用的 Port (TCP/UDP),並檢查 Selinux 權限
**第一次執行 Plugin 緩存會跳出許多錯誤,等待 20 秒後 F5 重新整理網頁,錯誤就會全部修正就能正常執行,詳見下圖

