此篇教學 Deluge 1.3.15 編譯 for Centos 7 也適用
要介紹第二個PT常用的客戶端為 Deluge
官方也有許多版本可供安裝
Windows Mac OS X Arch Gentoo Debian Ubuntu 等作業系統都有提供軟體版本
在使用 qBittorrent以前,個人還是很喜歡用 Deluge
簡單與輕量級的介面,個人覺得比 Transmission 還好用
雖然 Transmission 的陽春介面可以更換 gibhub 上別人開發過的優化介面
但用起來還是沒有比 Deluge 的介面流暢
國外 PT 站點對 Deluge 各版本的支援還是很好的
只是中國的 PT 站點在 Deluge 的使用及版本限制就比較多了
因而在國外的 PT 站點常發現使用 qBittorrentt & Deluge 的 peer 比 Transmission 還要多
還是那句話,如果你跟我一樣常開啟懶人模式的話,也可以透過添加 rpm 源來安裝
只是相對就無法選擇版本了,網路上對於 Centos 7 的教學幾乎以 rpm 來安裝的居多
有編譯的教學,大部份也都是以 Deiban 或 Ubuntu 為主,Centos 7 的教學蠻少的
晚上利用一點時間來實作編譯安裝 Deluge Centos 並做筆記,方便以後留存使用
有需要的人也可自行更換到更新的版本,只是最新版不見得 PT 站能使用
1.3.13 是目前我個人測試過,有支援 Deluge 站點大部份都能用,1.3.15 有些站不支援
====================================================================
①環境準備,請先切換具有 root 權限的 sudo 使用者
1 2 3 4 5 6 | yum install epel-release yum install update yum -y groupinstall "Development Tools" yum -y install boost-devel openssl-devel yum -y install python-devel python-pip GeoIP-devel gettext intltool pip install setuptools twisted pyopenssl simplejson pyxdg chardet geoip setproctitle pillow mako service_identity |
②下載 Deluge 並解壓 (可自行更換 1.3.15.tar.gz)
1 2 3 | wget http://download.deluge-torrent.org/source/deluge-1.3.13.tar.gz tar -xzvf deluge-1.3.13.tar.gz cd deluge-1.3.13/ |
③利用 Python 安裝
1 2 | python setup.py build sudo python setup.py install |
④設定 systemd deluge daemon service
1 2 3 4 5 6 7 8 9 10 11 12 13 | vi /etc/systemd/system/deluge-daemon.service ## 貼入以下內容 ## [Unit] Description=Deluge Bittorrent Client Daemon After=network.target [Service] User=root ExecStart=/usr/bin/deluged -d [Install] WantedBy=multi-user.target |
⑤設定 systemd deluge web service
1 2 3 4 5 6 7 8 9 10 11 12 13 | vi /etc/systemd/system/deluge-web.service ## 貼入以下內容 ## [Unit] Description=Deluge Bittorrent Client Web Interface After=network.target [Service] User=root ExecStart=/usr/bin/deluge --ui web [Install] WantedBy=multi-user.target |
⑥執行 deluge & web服務並設定開機自啟動
1 2 3 4 5 | systemctl daemon-reload systemctl enable deluge-daemon.service systemctl enable deluge-web.service systemctl start deluge-daemon.service systemctl start deluge-web.service |
⑦防火牆檢查
1 | systemctl status firewalld |
若為開啟狀態,並需把使用Web Port 8112加入到防火牆內
1 | firewall-cmd --permanent --add-port=8112/tcp |
後續再把自行設定連接Peer的Port加到防火牆內
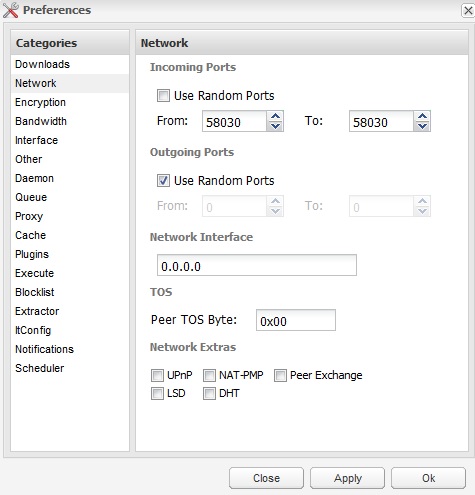
如下圖示使用的Port為58030

1 2 | firewall-cmd --permanent --add-port=58030/tcp firewall-cmd --permanent --add-port=58030/udp |
重啟防火牆設定
1 | firewall-cmd --reload |
⑧安裝完成,透過 Web 登入 (如需輸入密碼,預設密碼為 deluge)
** 如有設定防火牆,請先開啟Port 8112 (TCP) & Deluge 裡面設定使用的 Port (TCP/UDP),並檢查 Selinux 權限
1 2 | http://你的IP:8112/ ## 預設密碼為deluge,可自行修改 ## |
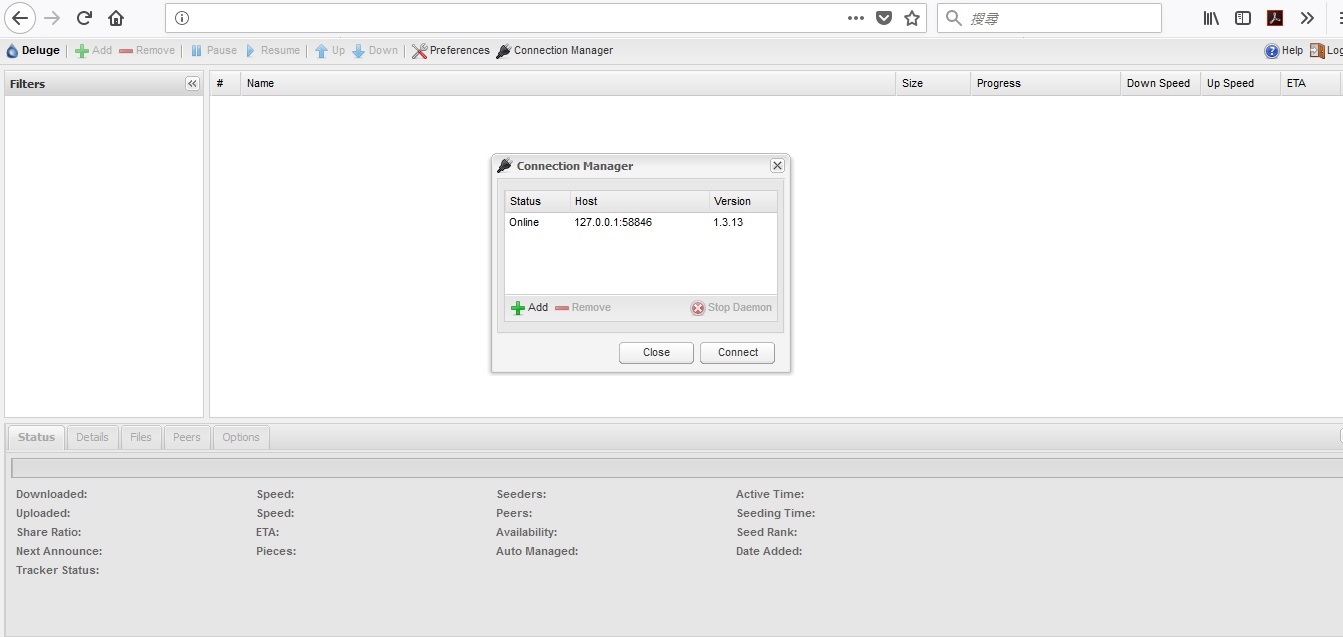
成功會顯示以下的畫面,點選 Online 那行,再按 Connect 即可使用 Deluge
